KitchenAid Dishwasher Not Draining? Fix It with Our Expert Guide
KitchenAid dishwashers are a popular choice for home appliances due to their exceptional cleaning features and a range of convenient functionalities. However, users may occasionally encounter issues, such as the dishwasher’s failure to drain properly. If you are experiencing this problem, the guide below can help you identify the possible causes and provide solutions to address the issue.
For your KitchenAid dishwasher not draining, there could be several reasons for it. It may be due to a faulty pump or a clogged drain hose. To quickly solve this issue, it is recommended that you inspect all the electrical and mechanical components related to the drainage system of the dishwasher. Once you identify the problem, you can implement the necessary fixes to resolve the issue.
Let’s dive in and figure out what’s causing the issue you’re facing! Check out the explanations below to get to the root of the problem and uncover the right solution for you.
Why is Your KitchenAid Dishwasher Not Draining?
Table of Contents
- 1 Why is Your KitchenAid Dishwasher Not Draining?
- 1.1 1) Faulty Drain Impeller
- 1.2 2) Poor Drain Pump
- 1.3 3) Solenoid Kit Failure
- 1.4 4) Blocked Drain Valve
- 1.5 5) Clogged Air Gap
- 1.6 6) Defective Timer
- 1.7 7) Faulty Pump And Motor
- 1.8 8) Defective Garbage Disposer
- 1.9 9) Dislodged Check Ball
- 1.10 10) Dislodged Check Valve
- 1.11 11) Broken Water Pump Belt
- 1.12 12) Faulty Drain Hose
- 1.13 The Bottom Line:
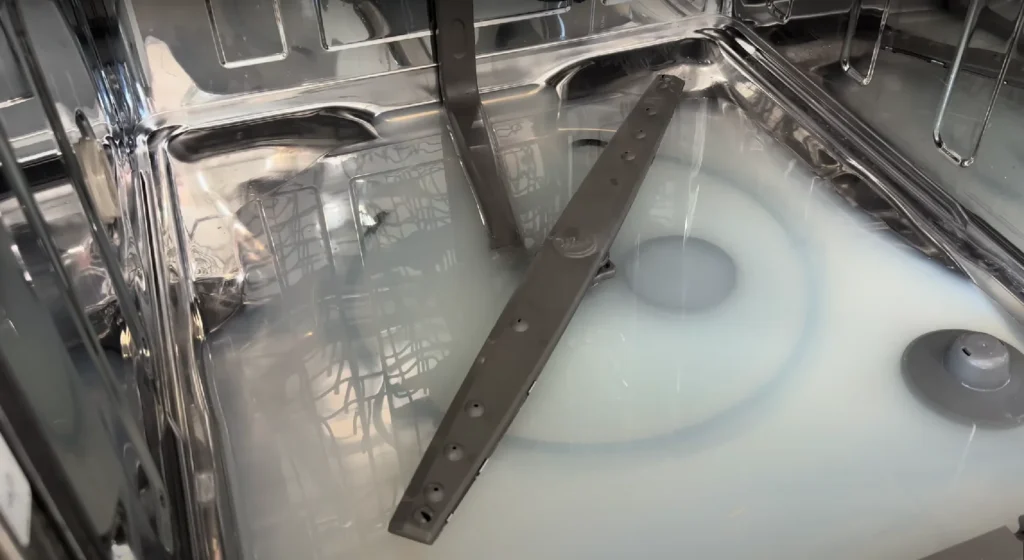
To address the issue of your KitchenAid dishwasher not draining, it’s crucial to understand the root causes of the problem. In many cases, the malfunction lies in the flawed process of expelling water from the dishwasher. While various factors can contribute to this error, a significant fault may be attributed to the ineffective water evacuation mechanism.
1) Faulty Drain Impeller
The drain impeller is a plastic component equipped with sharp curved blades designed to propel dirty water through the drain hose. Over an extended period of use, wear and tear can lead to the failure of the impeller. Additionally, foreign objects getting lodged in the impeller can cause it to become stuck, preventing proper drainage in your KitchenAid dishwasher.
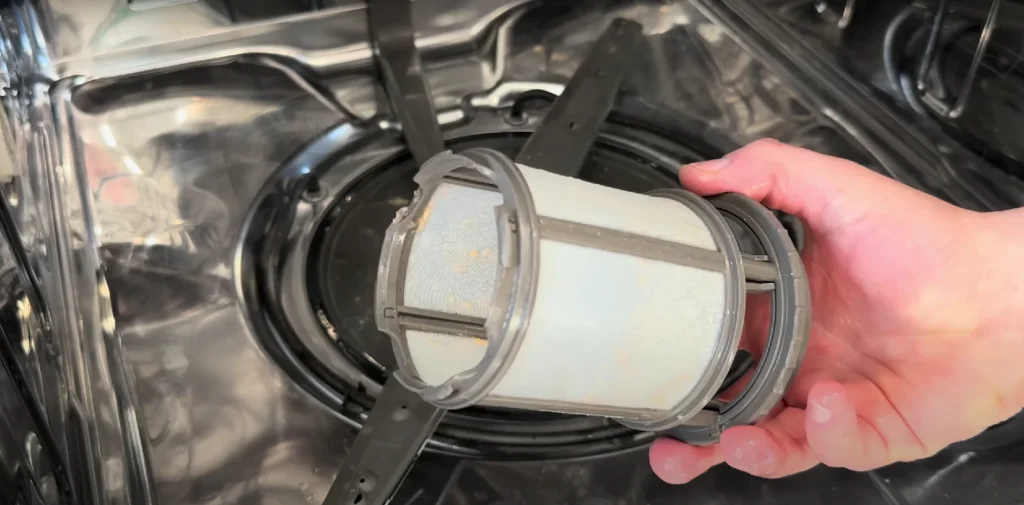
Fix: Thoroughly inspect the drain impeller.
To remedy the impeller issue, carefully check its condition by removing the lower rack to gain access. If the impeller is broken, prompt replacement is necessary. Follow these steps to replace the impeller:
- Unplug the dishwasher from the main power source.
- Disconnect it from the water source.
- Remove the lower access panel of the dishwasher.
- Locate and remove the impeller.
- Clean the impeller if any clogs are observed.
- Once removed, correctly replace the functional impeller in its original position.
2) Poor Drain Pump
If your KitchenAid dishwasher is experiencing drainage issues, examining the condition of the drain pump is essential. When your KitchenAid dishwasher refuses to drain, the drain pump should be the first component to investigate and address.
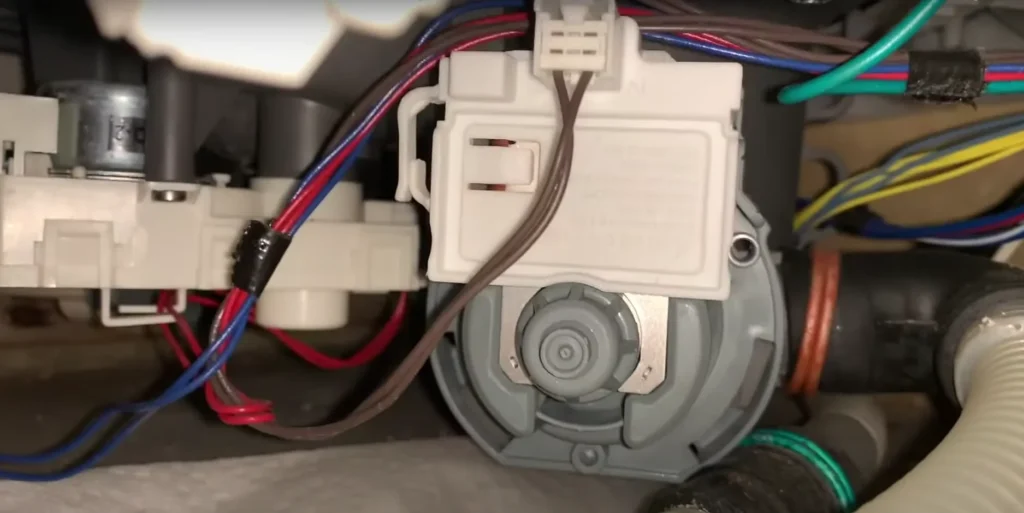
The drain pump is responsible for expelling dirty water from the machine to the home drain system. Several factors could hinder its proper functioning. One common issue is a poor electrical connection, leading to an inadequate power supply to the electrical component and a subsequent decline in efficiency.
Another potential problem is the blockage of the drain pump by grease or clogged particles, hindering the smooth flow of water outside the machine and causing drainage failure.
Fix: Clean the drain pump
- Inspect drain pump:
- Check for physical damage
- Remove debris with pliers
- Disassemble if needed:
- For significant blockages
- Clear blockage, clean with a brush
- Check wiring and connections:
- Inspect the dishwasher’s wiring
- Ensure proper electrical supply
3) Solenoid Kit Failure
The third potential reason your KitchenAid dishwasher may not be draining is the failure of the solenoid kit to open the drain valve, impeding the discharge of dirty water. When the solenoid kit is defective, the drain valve remains closed, resulting in improper drainage from your KitchenAid dishwasher. Typically, solenoid kit failures are attributed to wear and tear, rusting, or sudden power surges.
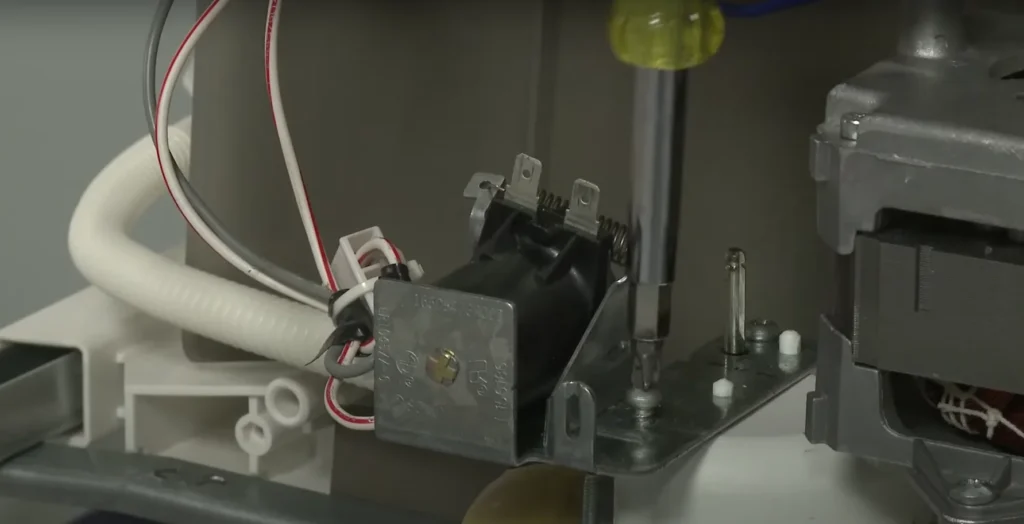
Fix: Addressing the solenoid kit issue
To rectify the solenoid kit problem, conduct a physical inspection to identify any visible damage. Evaluate the extent of damage, whether it’s electrical or mechanical, using a multimeter to assess the device’s continuity. If the readings indicate faults and the damage is substantial, replacing the solenoid kit is necessary. Follow these steps to replace the solenoid kit:
- Gather the necessary tools, including screwdrivers, pliers, and the replacement solenoid kit.
- Locate the faulty solenoid kit.
- Detach the defective solenoid kit from the dishwasher using pliers.
- Use a screwdriver to securely install and tighten the new solenoid kit in place.
By following these steps, you can effectively address solenoid kit failure and ensure proper drainage in your KitchenAid dishwasher.
4) Blocked Drain Valve
As previously mentioned, the drain valve plays a crucial role in facilitating the drainage of dirty water from your KitchenAid dishwasher. If this component is malfunctioning, it can result in your dishwasher failing to drain properly, necessitating a thorough examination. Positioned under the sink and working in conjunction with the solenoid kit, the drain valve is vital for ensuring efficient water drainage from the machine. Due to its location at the bottom and constant usage, it is prone to becoming obstructed by grease, food particles, or other debris.
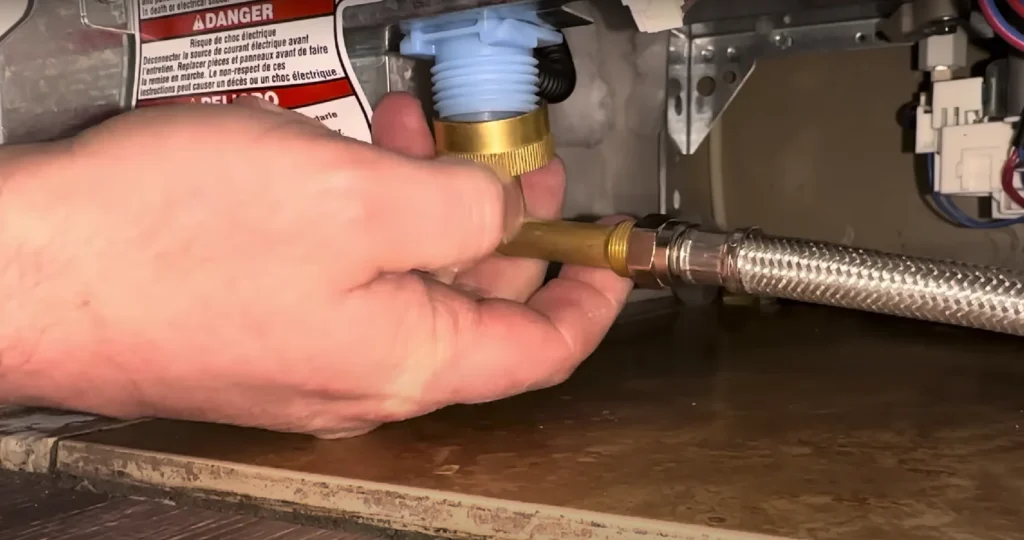
Fix: Clean the blocked valve
To address a clogged drain valve, begin by confirming the obstruction. If you are certain of a blockage, use a soft toothbrush to carefully remove the debris. If the blockage persists, replacement may be necessary, similar to other dishwasher components. Follow these steps to replace the drain valve:
- Disconnect the water source.
- Remove the hose pipe connecting the dishwasher and sink.
- Identify the faulty drain valve and detach it.
- Install the new drain valve and secure it firmly.
- Reconnect the hose and restore the water supply.
By performing these steps, you can effectively clean or replace the blocked drain valve, ensuring the proper drainage functionality of your KitchenAid dishwasher.
5) Clogged Air Gap
The air gap, a small plastic component situated on the sink where the hose connects to the dishwasher, is crucial for facilitating proper water flow. The hose on the other end leads to a hole in the dishwasher. The air gap’s role is to ensure smooth water drainage from the dishwasher while preventing the backflow of dirty water. A clogged air gap can contribute to drainage issues in your KitchenAid dishwasher.
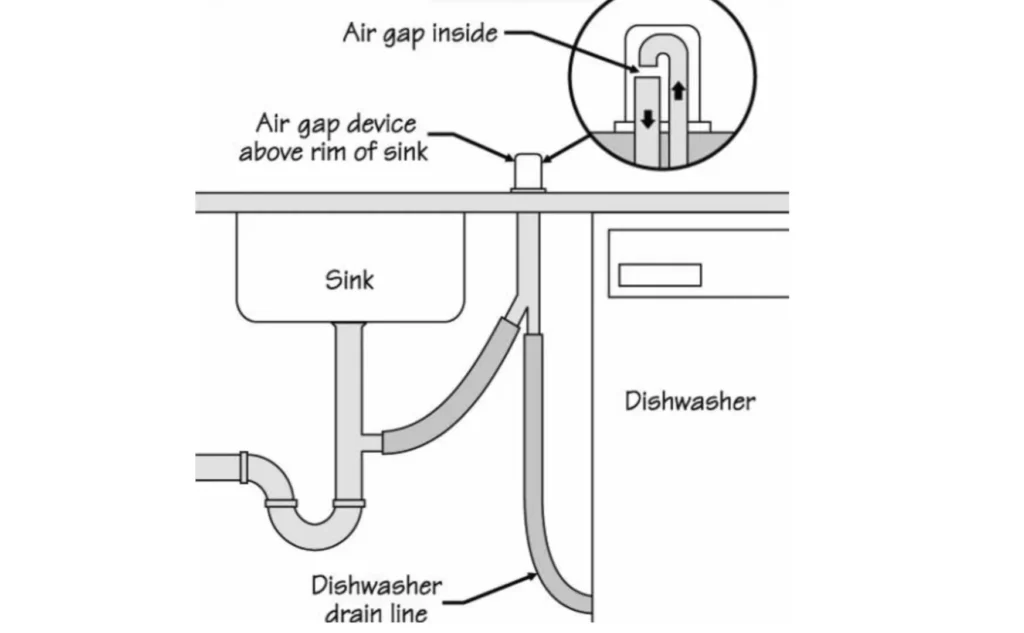
Fix: Clean the air gap
To address a clogged air gap, start by removing the hose to inspect for any obstructions. If a blockage is present, disassemble the air gap and clean away any debris or grease. After cleaning, reattach the hose and securely fasten the air gap back into place.
This maintenance step ensures that the air gap functions optimally, preventing drainage problems in your KitchenAid dishwasher.
6) Defective Timer
If your KitchenAid dishwasher is still experiencing drainage issues, it’s crucial to inspect the timer. The timer is responsible for orchestrating a continuous sequence of wash cycles and determining their duration. A faulty timer can lead to prolonged wash cycles and inconsistent draining.
Fix: Replace the timer
Begin by checking if the timer is turned on and functioning. Initially, try extending the wash cycle time to see if this resolves the problem. If the issue persists, replacing the timer may be necessary. Follow these steps to replace the timer:
- Remove the control panel of the dishwasher.
- Use a screwdriver to unscrew the existing timer.
- Attach the new timer securely and tighten it in place.
7) Faulty Pump And Motor
The pump and motor assembly is a critical component in the dishwasher’s drainage system. Typically, dirty water is expelled through the drain hose via a motor that rotates the impeller to pump out the water. If the motor and pump assembly fails due to drain line clogging or bearing issues, your KitchenAid dishwasher will struggle to drain properly.
Fix: Address the pump and motor assembly
To rectify motor issues, initiate a drain cycle and listen for any unusual sounds indicating motor damage. Once the cycle is complete, check the drain hose for clogs and remove any obstructing particles.
If abnormal sounds persist, it may signal the need for a complete replacement of the motor and pump assembly. Perform these checks to ensure the effective functioning of your KitchenAid dishwasher’s drainage system.
8) Defective Garbage Disposer
If your KitchenAid dishwasher is not draining properly, especially in older models, the issue may be linked to a hose blockage and a loose connection between the hose and the garbage disposer. This loose connection can lead to water flowing back into the dishwasher during the drainage process.

Fix: Evaluate your garbage disposer.
For newer KitchenAid dishwashers, ensure that the disposer is correctly installed following the guidelines provided in the user manual. Additionally, check that the knockout plug is inside the disposer to keep it closed when not in use.
Examine the disposer for any blockages to ensure smooth water flow through the disposer.
9) Dislodged Check Ball
A tiny black rubber ball located near the check valve at the back of the dishwasher serves a similar function, preventing the backflow of drained water. If this check ball becomes dislodged or misaligned, it can cause a blockage and contribute to your KitchenAid dishwasher not draining.
Fix: Realign your check ball
To address the position of your check ball:
- Disconnect your dishwasher from the power source.
- Look inside the drain for a black rubber ball.
- Once located, securely reposition it back to its designated place.
By following these steps, you can correct the placement of the check ball and ensure proper drainage in your KitchenAid dishwasher.
10) Dislodged Check Valve
Similar to the check ball, the check valve plays a crucial role in preventing the backflow of dirty water during the drainage process. Positioned on the drain line of the dishwasher, it works in tandem with the check ball. Displacement due to poor positioning, popping, or blockage by food particles can lead to your KitchenAid dishwasher not draining.
Fix: Replace the check valve
Locate the check valve on the drain line and carefully inspect it for any physical damage or signs of clogging caused by food particles or debris. Clean the check valve if clogging is detected, but if it’s damaged, replacement is necessary. Follow these steps to replace the damaged check valve:
- Disconnect the dishwasher from the power source.
- Detach the lower panel of the dishwasher.
- Remove the old check valve.
- Replace the new check valve and securely tighten it in place.
11) Broken Water Pump Belt
Beneath a KitchenAid dishwasher, a black rubber belt aids in pumping water outside the machine. If this belt is broken, the drain pump will fail to expel water, resulting in your KitchenAid dishwasher not draining.
Fix: Replace the belt
To replace the water pump belt at home, follow these steps:
- Disconnect the dishwasher from the power source.
- Detach the lower panel of the dishwasher.
- Remove the old belt.
- Install the new belt and securely tighten it in place.
12) Faulty Drain Hose
The drain hose serves as the primary connection between your dishwasher and garbage disposer. Over time, constant draining can lead to clogging with particles, causing the hose to become blocked and hindering the smooth flow of water. This blockage can result in your KitchenAid dishwasher failing to drain.
Fix: Clean the hose pipe
Similar to other solutions, cleaning the hose pipe is necessary to address clogging on both ends. Detach the entire hose pipe and use a gentle brush for cleaning, or soak it in vinegar overnight. Reattach the hose pipe once cleaned to restore proper drainage in your KitchenAid dishwasher.
If you encounter issues that prove challenging to resolve with the earlier guidance, it’s advisable to seek assistance from a professional appliance technician or contact the manufacturer’s customer support for additional help and potential repairs.
Find Your KitchenAid Refrigerator Manual: If you know the model number of your KitchenAid refrigerator, visit KitchenAid.com, enter the model number in the search bar, and look for “User Manual” under “More Information.” The manual may contain model-specific troubleshooting steps. Some refrigerators also have a physical copy of the manual under the top right-hand side cover.
Contact KitchenAid Support: If your KitchenAid ice maker continues to pose problems and requires more intricate repairs, it may be best to consider replacing the entire ice-making unit, which often necessitates professional assistance. Reach out to KitchenAid support at 1-800-422-1230 or schedule a visit from a certified technician online. In certain cases, your warranty may cover the repair cost.
The Bottom Line:
This comprehensive troubleshooting guide provides various reasons and solutions for your KitchenAid dishwasher not draining. Follow the steps outlined in the article for convenient troubleshooting at home. The primary cause of the issue often involves blockages or clogging, so carefully inspect all components and apply the suggested fixes.
If challenges persist, seek professional help from a plumber or contact KitchenAid customer service. With the information provided, external support may be minimized, ensuring you can address the problem effectively.