Maytag Ice Maker Not Working – Quick Fixes
Maytag ice maker is highly regarded for its convenience and user-friendly operation, making it a popular choice among consumers. However, if you are a frequent user of the Maytag ice maker, you may sometimes face the constantly frustrating issue of your Maytag Ice maker not working. It may get very annoying if this issue is not tackled immediately but do not worry! Our article is here to help guide you step by step to resolve this exact problem.
Read our article below to solve this problem of your Maytag ice maker not working within seconds in the comfort of your own home.
Generally, there are a series of Maytag refrigerator models that the solutions in this article will apply to so it is better to take a brief note of some of the following models that can use the solutions described under.
Following are some of the models:
Table of Contents
ERCQ36-001A/P55420-5C, MFD2561HES, MFI2568AEB, MFI2568AEW, MFI2569VEM1, MFI2569VEM4, MFI2569YEM0, MSD2454GRW, MZD2766GES, MZD2766GEW, MFI2269VEM10, MFI2570FEZ06, ERCQ42-001A/P55420-6C, MFI2568AES, MFI2569VEM2, MFD2560HES, MZD2766GEB
Once you have checked if your model belongs under the list of the models that this article is applicable for, we can now proceed to the different fixes you can perform if your Maytag ice maker is not working. Ensure that you turn off the power before dealing directly with any electronic components or wirings.
Why is Your Maytag Ice Maker Not Working?
Your Maytag ice maker may not be working for various reasons, and this troubleshooting guide can help you identify and resolve the issues. Potential causes include checking if the ice maker is turned on, ensuring the freezer temperature is at or below 0 degrees Fahrenheit, adjusting water pressure and the water inlet valve, examining the ice maker module and ice chute, and inspecting and possibly replacing the ice level control board.
By following these steps, you can address common problems that may be preventing your Maytag ice maker from producing ice.
Also, check Frigidaire IceMaker Not Working
Ensure the Ice Maker is Turned On
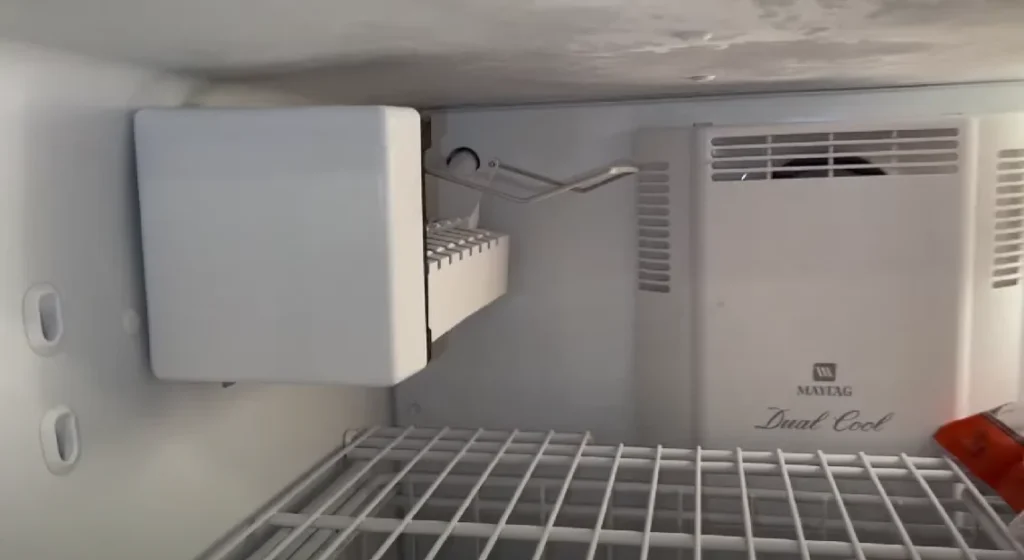
- Check Ice Maker Status: When your Maytag ice maker is not producing ice, the first step is to ensure that it is turned on and operational.
- Varied Operation Methods: Maytag offers various refrigerator models, and each may have a slightly different method for turning on the ice maker. This means you might need to navigate through different settings to activate it.
- Power Button Locations: The power switch or button to activate the ice maker can be located in different places depending on your Maytag refrigerator model. In some models, it might be on the refrigerator’s control panel, while in others, it could be on the ice maker assembly itself.
- Lever Activation: Some Maytag refrigerator models incorporate a lever mechanism that engages the ice maker when you push it down. This lever initiates the ice-making process.
- Consult the Manual: If you’re having trouble locating the power switch or understanding how to turn on the ice maker, don’t hesitate to refer to the Maytag ice maker manual that came with your appliance. The manual should provide specific instructions tailored to your model, making it easier to identify and activate the ice maker correctly.
Adjust the Temperature
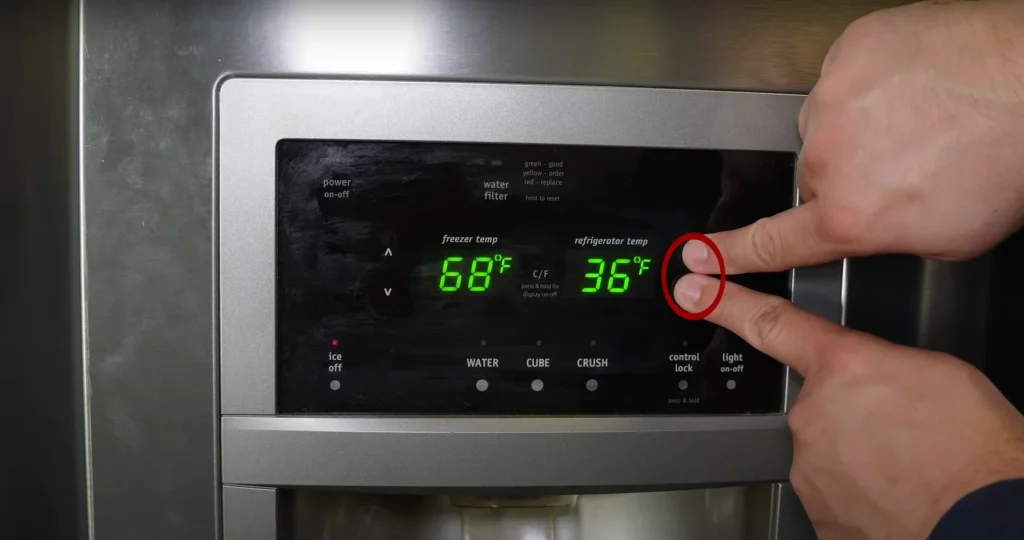
- Temperature Requirement: For your Maytag ice maker to function correctly, it’s essential to ensure that the freezer temperature is set at or below zero degrees Fahrenheit. This is the optimal temperature for ice formation.
- Critical Temperature Range: If the freezer temperature exceeds 5 degrees Fahrenheit, your ice maker may not operate as it should.
- Monitoring and Adjustment: To address this issue, you should regularly monitor the freezer’s temperature. Many modern freezers have digital displays that make it easy to check and adjust the temperature settings accordingly.
- Manual Adjustment: In cases where your freezer lacks a digital display, you can manually adjust the temperature using a thermometer. Place the thermometer inside the freezer for a day to accurately assess the temperature. If it’s above the recommended zero degrees Fahrenheit, adjust the freezer settings to reach the desired temperature.
By maintaining the freezer at the right temperature, you ensure that your Maytag ice maker has the ideal conditions for producing ice effectively.
Adjust the Water Pressure
- Water Pressure Importance: When your Maytag ice maker isn’t receiving adequate water pressure, it can result in inefficient ice production. To resolve this issue, you need to address the water pressure.
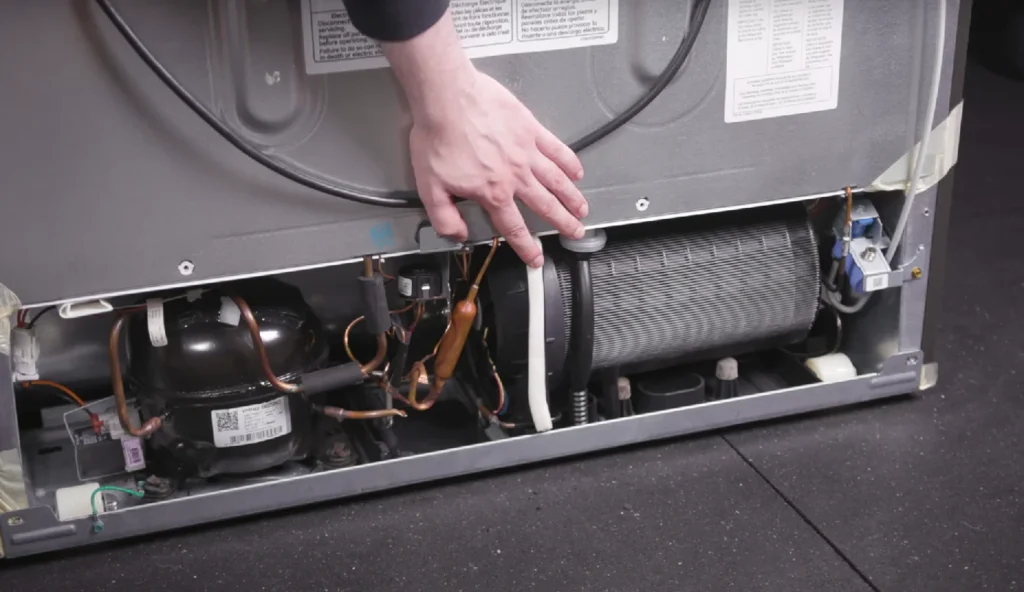
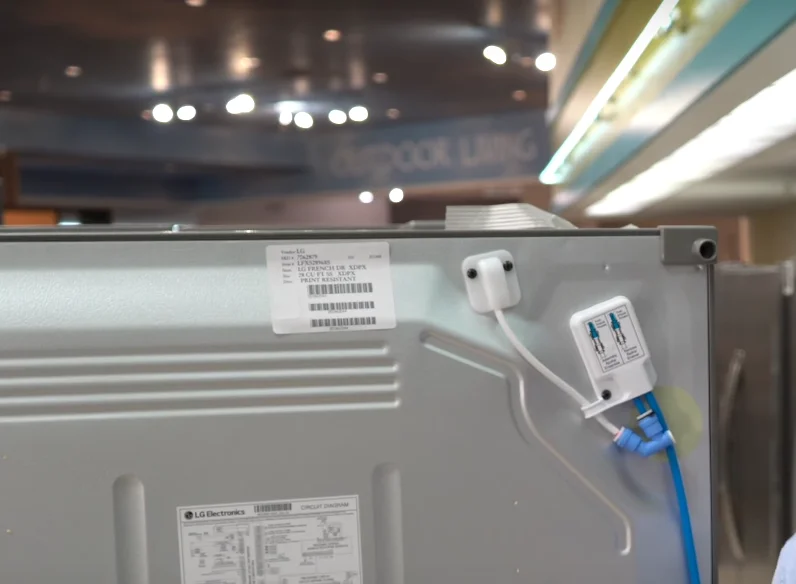
- Accessing the Water Inlet Valve and Line: To do this, you may have to remove the rear access panel of your refrigerator. Behind this panel, you’ll find the water inlet valve and the water inlet line.
- Connection to the Water Inlet Valve: The water inlet line is connected to a valve located at the back of the refrigerator. The valve is responsible for regulating the flow of water into your ice maker.
- Safety Precautions: Before attempting any work, ensure that you turn off the power to the refrigerator and disconnect the water supply. Safety is paramount when working on electrical appliances.
- Testing the Water Pressure: After safely accessing the water inlet valve and line, you can test the water pressure. You can use a water pressure gauge to measure the pressure accurately.
- Alternative Test: Alternatively, if you don’t have a pressure gauge, you can place the waterline over a bucket and turn the water supply back on. If the water merely trickles out or doesn’t flow steadily, it indicates that the water pressure is insufficient.
In such a case, you’ll need to take steps to increase the water pressure, which may involve adjusting water supply settings or checking for any obstructions or kinks in the water line. Ensuring proper water pressure is vital for your Maytag ice maker to work efficiently.
Adjust the Water Inlet Valve
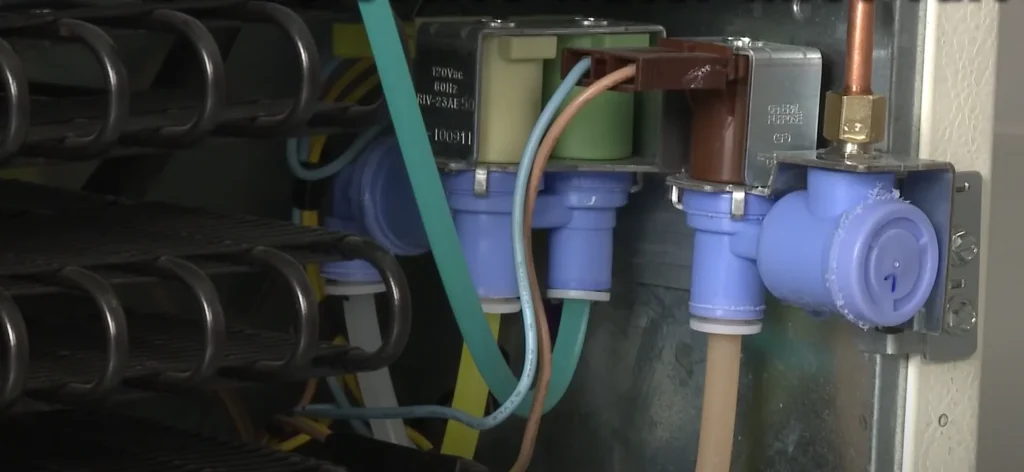
- Water Inlet Valve Function: The primary role of the water inlet valve in your Maytag refrigerator is to control the flow of water into the appliance. It opens and closes to provide water to the ice maker when needed.
- Age-Related Issues: Over time, especially in older ice makers, the water inlet valve can experience mechanical or electrical problems. These issues can lead to a malfunctioning ice maker.
- Mineral Buildup Concerns: Mineral deposits can accumulate in the water inlet valve, blocking its proper operation. This buildup prevents the valve from opening and closing as required. If cleaning the valve does not restore its function, it’s time to consider replacing it.
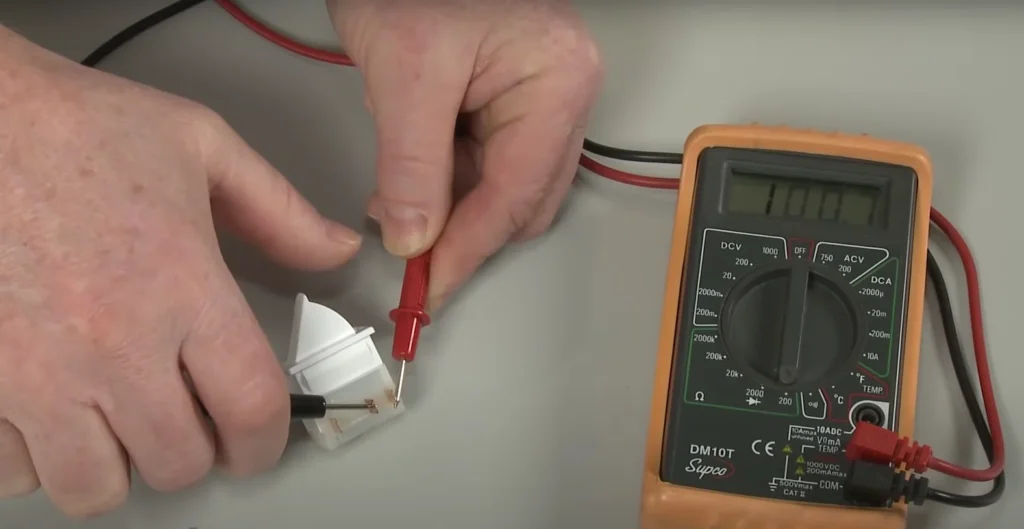
- Electrical Failures: Electrical failures in the water inlet valve typically occur due to constant wear and tear over the years. To diagnose an electrical problem, you can use a multimeter.
- Using a Multimeter: Locate the water inlet valve, usually positioned at the back of the ice maker. Then, use a multimeter to check for continuous readings. This involves making contact with the solenoid coils on the valve.
- Replacing the Valve: If the multimeter readings do not show continuity for either of the solenoid coils, it’s an indication that the water inlet valve is electrically faulty. In such cases, it’s necessary to replace the valve entirely with a new one.
In summary, addressing water inlet valve issues is essential for maintaining the proper function of your Maytag ice maker, and this can involve both mechanical and electrical troubleshooting, followed by potential replacement if necessary.
Check the Ice Maker Module
- Module’s Function: The ice maker module is a crucial component in your Maytag refrigerator. It’s responsible for managing the ice-making process. This module features a motor that rotates the ice tray and a thermostat that detects when the ice tray is full. Once full, it triggers the ejection of ice and the refilling of the tray with water.
- Faulty Module Impact: If the ice maker module is malfunctioning, it can lead to your Maytag ice maker not working properly or not working at all.
- Inspect Ejector Blades: To address this issue, first, check if the ejector blades are free of ice. Ice accumulation on these blades can hinder the ice-making cycle. Make sure they can move freely to allow for smooth ice production.
- Testing for Electrical Issues: If you suspect an electrical problem with the ice maker module, you can use a multimeter to test for any irregularities in the electrical readings. This involves assessing the electrical connections and components within the module.
- Professional Assistance: Keep in mind that analyzing electrical readings can be a challenging task. If you’re not experienced with using a multimeter or diagnosing electrical issues, it’s advisable to seek the help of a professional technician who has the expertise to accurately assess and address any problems with the ice maker module.
In summary, the ice maker module is a critical part of your Maytag ice maker, and any issues with it can disrupt the ice-making process. By ensuring the ejector blades are free of ice and seeking professional assistance if needed, you can diagnose and rectify potential problems with the module, thereby restoring the proper functioning of your Maytag ice maker.
Defrost the Ice Maker Chute
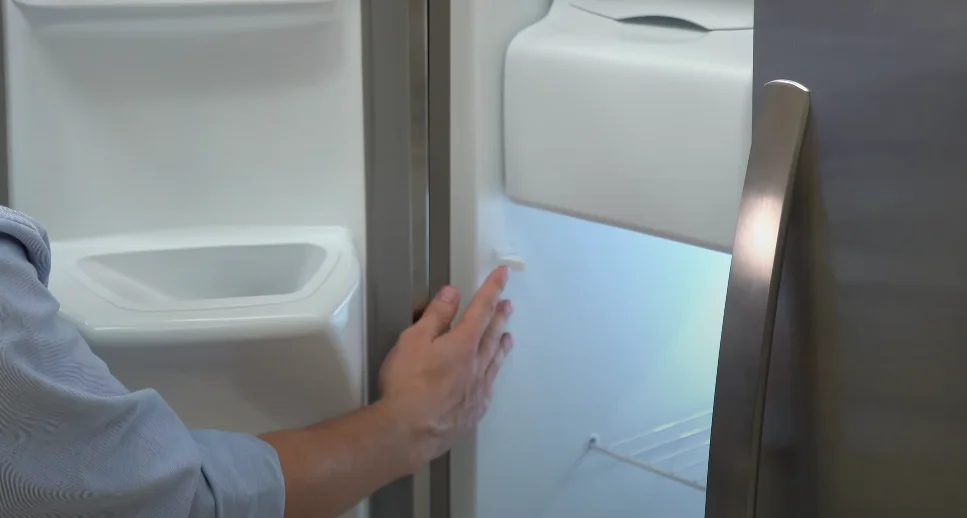
- Chute Blockage Concern: In some ice makers, a chute is responsible for dispensing ice. If this chute becomes blocked, it can impede the functioning of your Maytag ice maker.
- Blockage Impact: A blocked ice chute can prevent ice from moving smoothly through the system, leading to reduced ice production or even a complete malfunction of the ice maker.
- Applying Heat: To resolve this issue, you can defrost the ice maker chute. One effective method is to apply external heat to melt the ice blocking the chute. A commonly used tool for this purpose is a hairdryer.
- Caution with Heat Application: When using a hairdryer or any external heat source, exercise caution to prevent damage to the ice maker’s internal components. You want to melt the ice obstructing the chute without inadvertently causing harm to the ice maker itself.
- Intermittent Heat: Apply the heat source intermittently, allowing the ice to melt gradually. This approach prevents sudden temperature changes that could harm sensitive components within the ice maker.
By defrosting the ice maker chute, you can ensure that ice can flow freely, allowing your Maytag ice maker to operate as intended. It’s a relatively simple and effective solution for resolving chute blockages that may hinder ice production.
Fix the Ice Level Control Board
- Role of the Control Board: The ice level control board plays a crucial role in your Maytag ice maker’s operation. It uses an infrared beam to assess whether there’s a sufficient amount of ice produced and whether the ice maker needs to continue its ice-making process. If it determines that enough ice is available, it shuts off the ice maker to prevent overproduction.
- Faulty Control Board Impact: When the ice level control board itself malfunctions, it can disrupt the operation of your Maytag ice maker, potentially causing it to stop working altogether.
- Visual Assessment: Begin by visually inspecting the control board and its components. Look for any signs of physical damage or burn marks. These can indicate a problem with the board.
- Replacement If Necessary: If you discover damage or burn marks on the control board, it’s typically an indication that the board needs to be replaced.
- Locating the Control Board: To locate the ice level control board, check on the side of the ice maker compartment. Your user manual can often provide guidance on its precise location.
- Access Panel: The control board is usually found behind an access panel, which can be unscrewed for easy access. Once you’ve removed the panel, you can proceed to replace the control board.
- Installation of the New Board: Installing the new control board involves connecting the wiring as per the manufacturer’s instructions and then securely tightening the screws to affix it in place.
Addressing concerns associated with the ice level control board ensures the proper operation of your Maytag ice maker, enabling it to produce the right amount of ice without overfilling or experiencing diminished performance.
By following these comprehensive troubleshooting steps and recommendations, you can effectively diagnose and address a wide range of issues that may arise with your Maytag ice maker, ensuring it continues to produce ice reliably and efficiently.
If you encounter problems that prove too challenging to fix with the earlier guidance, it’s advisable to reach out to a professional appliance technician or Maytag’s customer support for additional assistance and any necessary repairs.
Locate Your Maytag Refrigerator Manual: If you have your Maytag refrigerator’s model number, visit Maytag’s official website and enter it in the search bar. Look for the “User Manual” under the “More Information” section. You might discover model-specific troubleshooting steps in the manual. Additionally, some refrigerators include a physical copy of the manual beneath the top right-hand side cover.
Contact Maytag Support: If your Maytag ice maker still isn’t working after following the troubleshooting steps, it might be best to consider replacing the entire ice-making unit. Such repairs often require professional intervention. Get in touch with Maytag’s support team at 1-800-344-1274. You can also schedule a visit from a certified technician online. In some cases, your warranty may cover the repair costs.
Conclusion
In conclusion, the comprehensive guidance provided in this article is designed to assist you in diagnosing and resolving various issues that may impede the performance of your Maytag ice maker. These troubleshooting steps are presented in a logical and step-by-step fashion, making it easier for you to pinpoint and address the specific problem affecting your ice maker.
However, in situations where the troubleshooting steps outlined in the article prove insufficient to restore your Maytag ice maker to proper working condition, we strongly recommend reaching out to Maytag’s customer service directly. Their expert support can offer more detailed and personalized guidance tailored to your specific circumstances. This direct contact with the manufacturer’s customer service ensures that you receive the most accurate and effective solutions for your ice maker issues, ultimately leading to its optimal performance.